Learn to Sew: Get the Scoop On Pattern Layout For Cutting and Marking
This post contains affiliate links. As an Amazon Associate I earn from qualifying purchases.
Taking the time to properly layout and mark your fabric is crucial to sewing success. It not only helps maximize your fabric usage, but it also provides a solid guide and foundation for the rest of the construction process. Yes, it takes time and patience to do it right, but it’s worth the effort to have a well-made and well-fitting garment.

Overview of instructions:
Open the pattern instructions to the first page, with the suggested fabric layout.

Flat drawing view options:
At the top of the page, there are drawings of each of the view options included with the pattern, both front and back are shown. All designs have front and back darts and a center zipper. But notice the longer skirt view (A-B) have a slit along the center back seam, but it is not included in the shorter skirts (C-E). This information will come in handy when you start sewing.

Numbered pattern pieces:
This flat drawing shows, the number of pattern pieces needed to complete the skirt, and then lists out the number of each individual pattern piece and the part of the skirt which goes with it. This pattern is very simple and has a minimal number of pattern pieces, but with more complicated patterns with a variety of designs, this section will provide invaluable information for cutting.

Pattern markings & adjustments:
This section of the pattern provides a key to all of the markings printed on the pattern itself. These marks are standard across the major pattern companies. Also included are instructions to add or reduce the length of your finished garment.

Cutting, Marking, and Sewing Information:
All patterns contain cutting and marking instructions, as well as how to fold the fabric for cutting.
While most patterns are cut on a double thickness with a fold, all patterns are not the same. Make sure you follow the instructions recommend for cutting the design of your choice. As you may notice, the sewing information section isn’t detailed and doesn’t provide enough information for a beginner sewer. There is the option to baste or pin the entire garment together to check the fit before starting to sew. Basting, can be done on a machine or by hand, and is a process of using large stitches for a test run of your garment. The stitches are large so they can be easily removed for final sewing. All US pattern companies have 5/8 inch seam allowances built into the pattern design, unless otherwise stated. Always check your pattern to make sure you sew the seam allowances the correct width.

Fabric cutting layout:
The bottom half of the instruction page will show you the layout of your fabric in 45 inch and 54-60 inch fabrics as well as layout for interfacing. If your pattern has a layout for nap, it will be shown here. The key at the top of the section shows the different sides of the pattern piece for placement during cutting.

Layout for 45 inch fabric:
The fabric that I’m using is 45 inches wide, so this is the layout I will use. The layout is the same for all pattern variations. I’m making making view D, the knee length skirt. Piece 1, the back of the skirt is placed right side up, but Piece 2, the front of the skirt is placed right side down along the fold of the fabric. Also on the fold is the front facing.
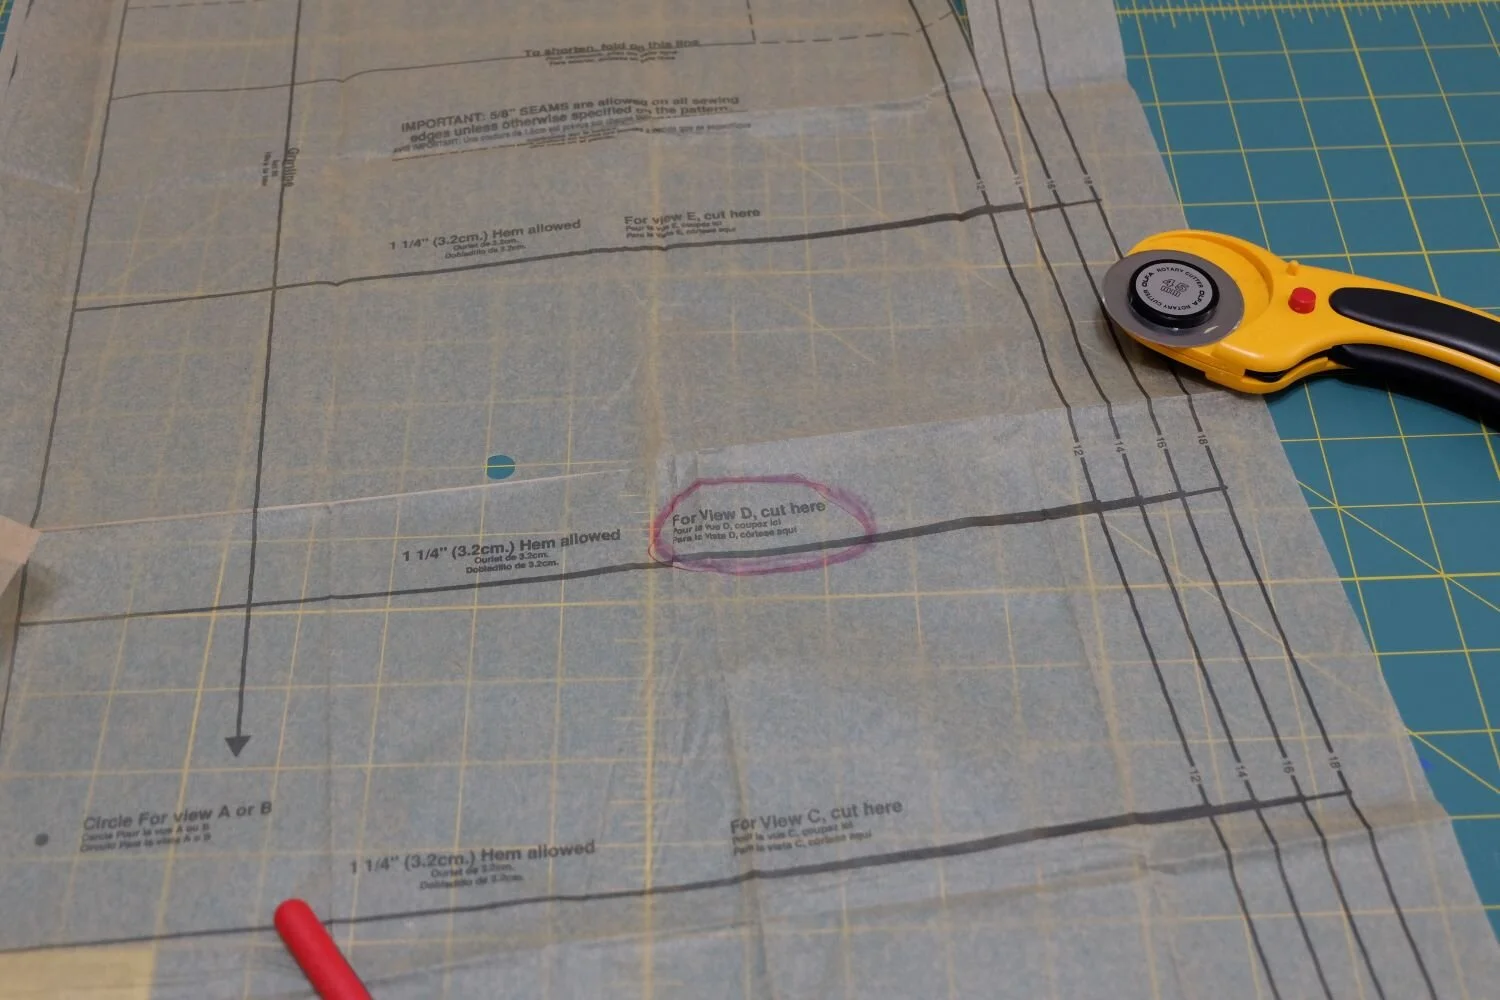
Cutting out the pattern:
Before I start cutting the individual pattern pieces, I take the time to circle the the size and view I’m cutting as well as any instructions. This extra step is an easy way to keep track of what I’m cutting and any additional information about multiple cuts of fabric.

As you start cutting, follow the thick solid line for your size. You can cut on the line or along the outside of the line. I’m using a rotary cutter and mat to speed up the cutting process. Olfa cutting mats can be expensive, so keep an eye out for sales. I nabbed these during a 50% off sale at a national fabric store.
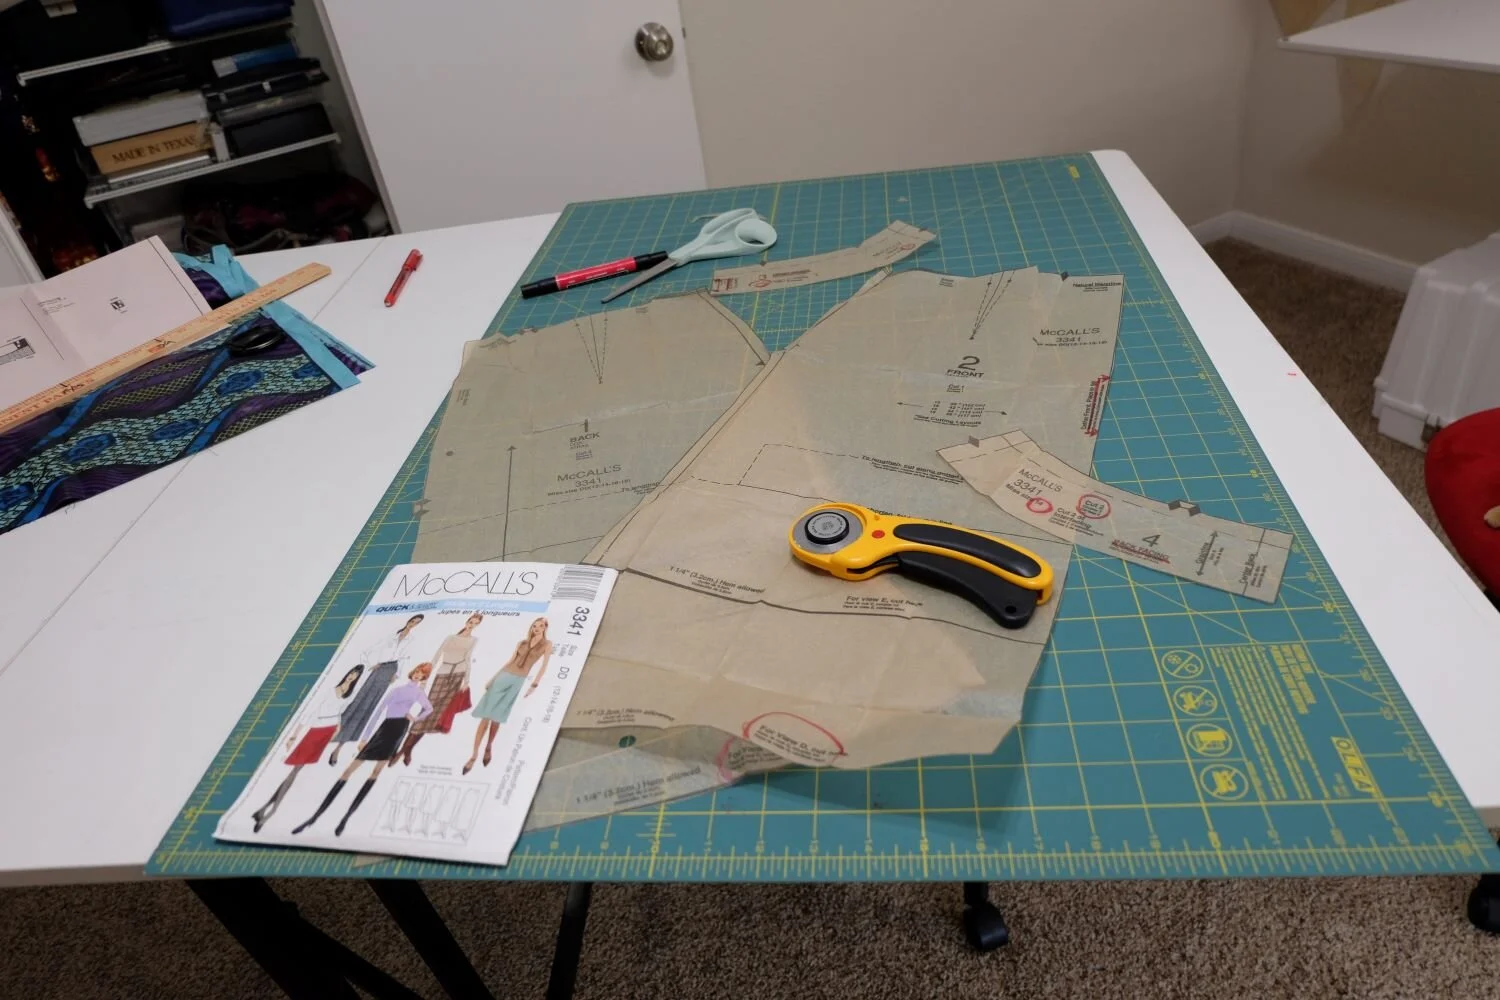
Once you’ve finished cutting out your pattern, double check to make sure you have the right number of pattern pieces. This basic pattern has four pieces.

Iron the pattern pieces:
Make sure your iron setting is on low and the steam feature is turned off. Iron your pattern to ensure it lies flat before starting to cut your fabric.

Fabric grain:
Tear your fabric to make sure it is own grain before laying out the pattern pieces for cutting. If you missed the post about getting fabric on grain, you can read it here.

Matching grain lines:
Once you fabric is on grain, the next step is to make sure the grain lines of your pattern match the fabric grain. This is achieved by measuring the printed grain line on the pattern with the selvage. Make sure the distance from the selvage is the same distance from the top, middle, and bottom of the pattern grain line. Repeat this process for all pattern pieces that aren’t placed on the fold. The pattern pieces placed on the fold don’t need to be measured since the fabric is folded on grain.
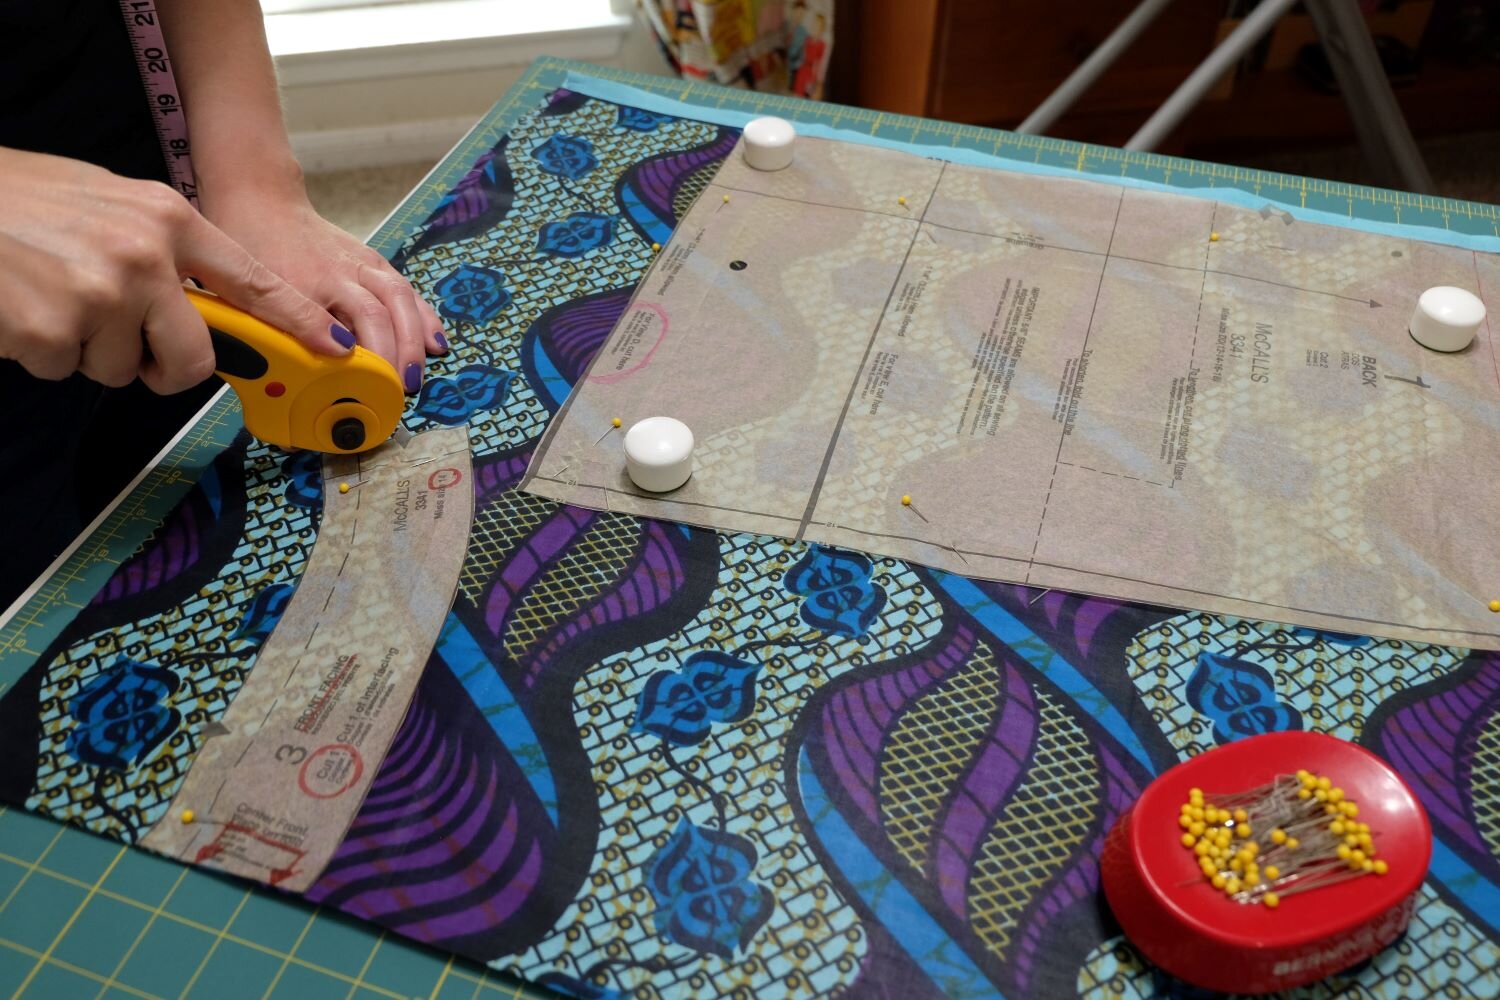
Start cutting:
Once you have all of the pattern pieces laid out and pinned to the fabric, you’re ready to start cutting! Make sure you cut out the notches and triangles from the paper pattern so you’ll be able to match the pieces together once you start sewing.

Interfacing:
Once you have cut the facings in fabric, there is no need to unpin for cutting interfacing. Just re-pin the pieces to the interfacing as shown in the photo!

Transfer the pattern markings:
The type of transfer paper you use can make a world of difference. I have used every type available from a fabric store, with varying degrees of success. Recently I found Saral Transfer Paper, which does a great job of making marks that are easy to read and which stay put through the sewing process. As an added bonus, they don’t set when ironed, they can be erased if needed, and they come in five different colors.

First, choose the colored paper that provides the best contrast with your fabric. Without unpinning, slide the transfer paper between the layers of fabric so you’ll be marking the wrong side of the fabric. You’ll need a tracing wheel to transfer the line, and a pencil to transfer the dots.

Roll the tracing wheel down the dashed and solid lines of the dart. Then, use a pencil to transfer the dots on either dashed line and at the dart end point.

Make sure the marks transfer before unpinning your fabric. Repeat the process to transfer all pattern markings as needed.
Once all the pattern markings are transferred to your fabric, you’re ready to start sewing!

Hi, I’m Toni. I teach creative gals how to sew—no experience needed!
Start Here, Learn to Sew!